
Most runners know they should do yoga. Most runners also think that means spending an hour in a yoga studio, but it doesn’t have to be that way. Even a few poses practiced regularly could mean the difference between an okay run and a good run. They call it a practice for a reason.
I am starting a new series called Runner Strong Yoga. Each month or so I’ll share one yoga pose that complements your running. I’ll share tips to do the pose correctly and fix any misalignments you might have. I’ll let you know what muscles the pose targets and any contraindications for the pose.

Pyramid Pose: Good all around post run stretch
Pyramid Pose is actually a very accessible pose for most runners. It’s a standing pose that can easily be done before you even head home. Simply grab onto a tree, a wall, the trunk of your car, or a park bench. In addition to being a great hamstring and low back stretch, done right it can also help you strengthen your core and your legs.
Muscles Targeted
- Lower Back
- Hamstrings
- Moderate hip stretch
- Good allover body stretch
Contraindications
- Be careful going too deeply into Pyramid Pose if you have low back issues
- Be careful if you have hamstring injuries/issues
Watch Out For
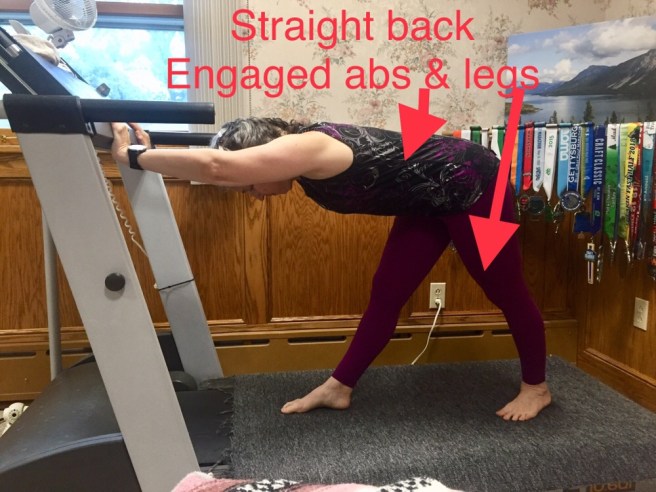
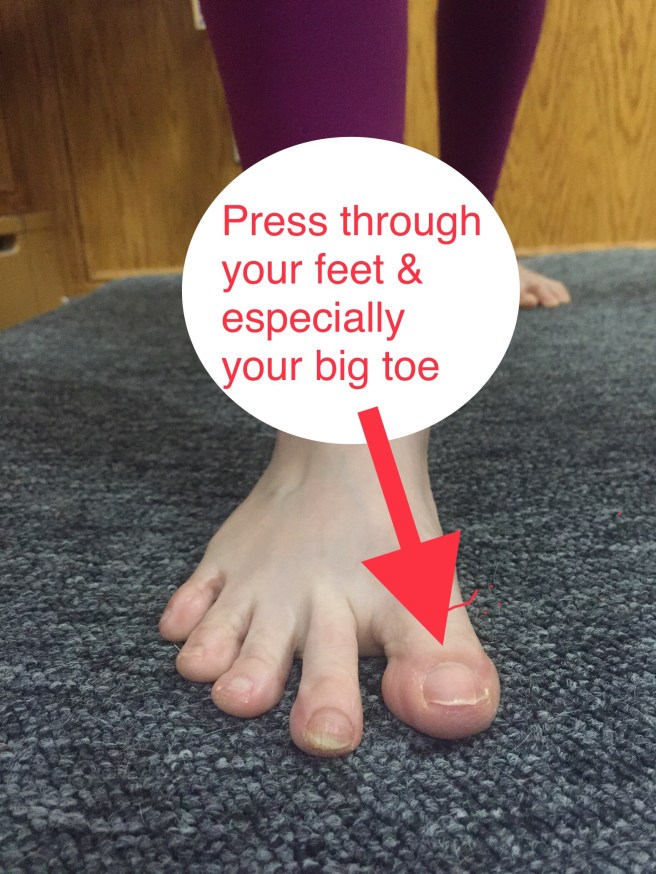
- Feet not pressing evenly into the ground
- Legs not straight and/or activated
- Hips not level, side to side, up and down — or both!
- Back rounding or dipping down (can you balance a coffee cup on your back?)
How to Modify It
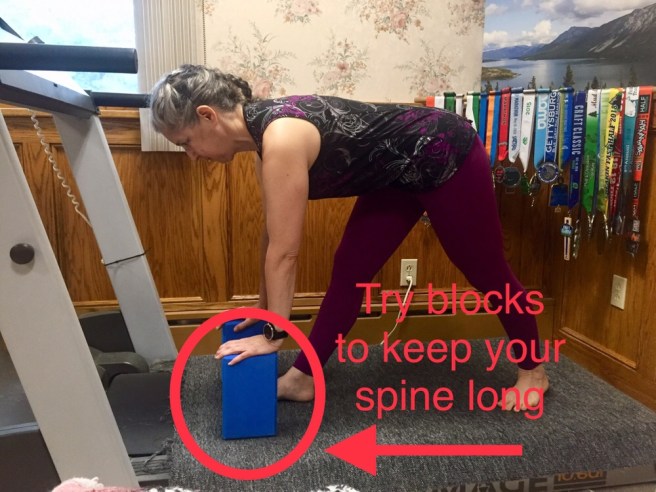
While this pose is great for beginners and experienced yogis, props can be a great addition to really give you the full benefit of the pose.
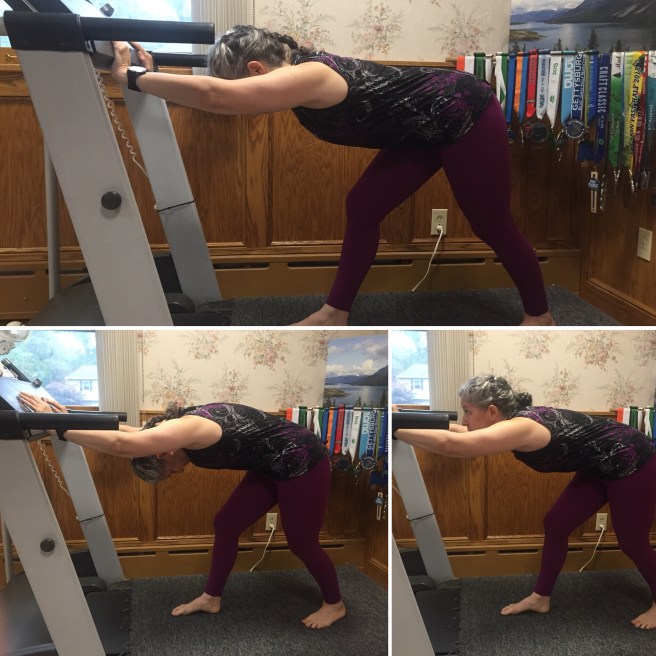
- Prop your fingers up on blocks (no death grips, please!)
- Practice with your hands pushing into a wall (or tree, or park bench if outside — even your treadmill!)
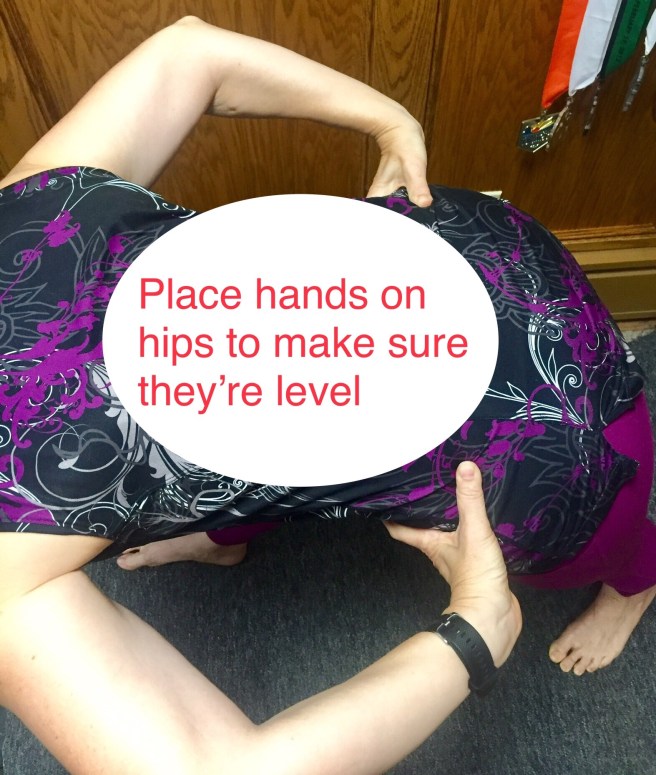
- Place your hands on your hips or low back to see if your hips are level
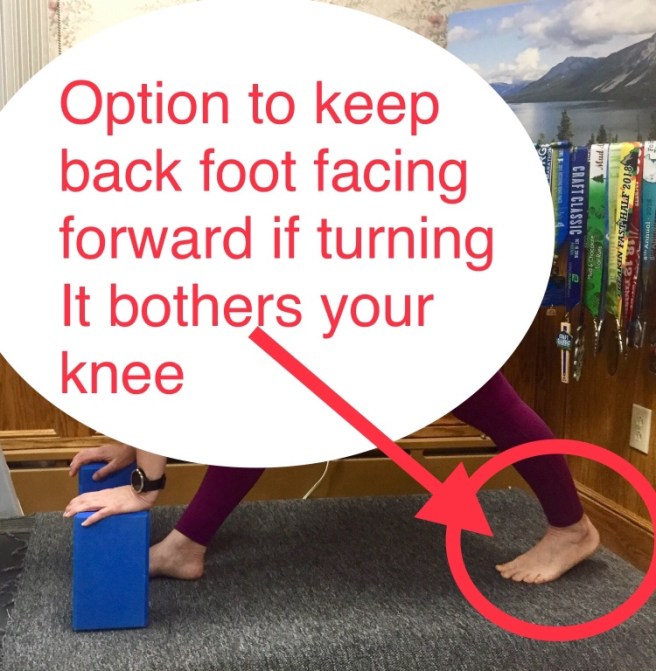
- If you find turning out your back foot bothers your knee, just keep the foot pointing straight ahead — but still keep it very active!
Now let’s get into Pyramid Pose
- Standing at the top of your mat, legs hip width apart, step one leg back roughly the width of one leg. Both legs are straight, with just a slight microbend at the knees.
- Toes of the front leg point forward.
- Rotate the back leg out roughly 30 degrees, from the hip. If this bothers your knee, you can allow the heel of the back foot to come off the mat, or play with the angle of your foot until it’s comfortable for you.
- Press both feet firmly into the mat (if available to you), and really activate both legs so much that you feel a slight lift in your kneecaps.
- Feel your legs yearning towards each other and your big toe pressing firmly into your mat; this will help you balance.
- Draw your navel to your spine to activate your core.
- Think about lengthening toward the front of your mat as you slowly hinge forward from your hips until your back is parallel to the ceiling.
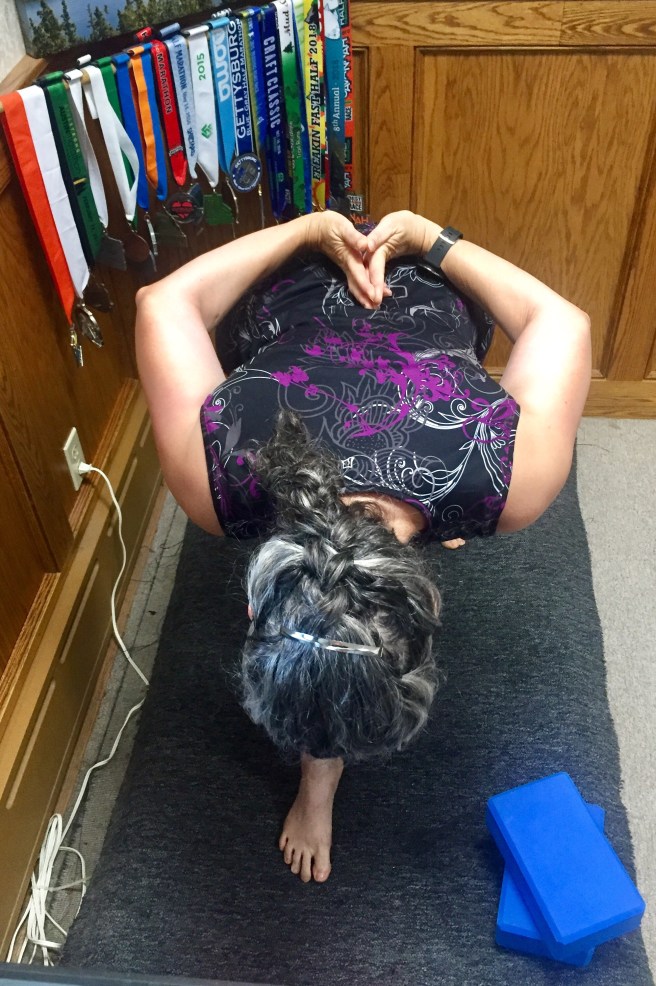
- Keep your gaze down and slightly forward (to the top of your mat if you’re on one); you want your neck in line with your spine.
- As you hold this pose for several breaths, think about your head and your tailbone continuing to move away from one another.
- To come out of the pose, slowly raise your head back towards the ceiling.
- Step your back foot forward to meet your front foot.
- Pause, notice if you feel differently side to side.
- Repeat Pyramid Pose on the second side.
Do you have a yoga pose you’d like to see featured here?
Do you have a favorite arm variation for Pyramid Pose?
If you try Pyramid Pose after a run, let me know how it felt!

Great idea for getting yoga into your blog. I’m sure this will help many runners.
I tend to prefer going to a class. In addition being social, unless I take a photo I do not know if I’m doing the pose correctly. In a class the instructor always walks around to make tweaks in each person’s pose.
But maybe you will motivate me to do a pose now and then on my own.
LikeLiked by 1 person
Actually taking photos of yourself can be really helpful. I’ve taken a lot of yoga classes where instructors don’t do adjustments & in a large class it can be too time consuming.
LikeLike
I agree. But who has time to take photos.
I used to go weekly to Heartspace and the classes were small. That was important to me.
LikeLiked by 1 person
I’ve only done a couple of workshops there, and they were small, but even then the teacher doesn’t do a lot of adjustments, although she’s a good teacher. I was going almost weekly to Radiance, until everything happened with my dad. The classes I was going to just always seem to be on days I am not here. 😔
LikeLike
I wonder if there are variation of pyramid poses because we do one I. Body flow and we are tilted to the side.
LikeLiked by 1 person
Since the point of pyramid pose is a long spine, my guess is what you’re describing is either triangle or revolved triangle. The legs are very similar but the upper body is kind of on the side and the arms reach for the floor & ceiling. Or maybe side angle . . .
LikeLike
I love this series idea! Pyramid pose is a good one. I cannot get my hands behind my back like that. Shoulders and chest way too tight. Thanks for the tips!
LikeLiked by 1 person
My shoulders are pretty tight too. For instance I can’t do a bind behind my back where the hands clasp — not even close! It may just be my anatomy but I’m not sure.
You can also just hug your elbows instead of prayer hands.
LikeLike
Yay for pyramid!! Great tips!
LikeLiked by 1 person
Thanks, Natalie. It is a really good all over body stretch!
LikeLike
I love that you’re starting a Runner Strong Yoga series. It will be helpful to so many of us. I would love to see you feature pigeon pose sometime. It’s a good one, but it’s hard for me and I would love to see your variations and modifications for tight runners like me.
LikeLiked by 1 person
Pigeon is hard for a lot of people & actually not always good for a lot of people, I learned. There are some great variations, though, that are really accessible.
LikeLike
What a brilliant idea for a regular series and, as someone who practises yoga myself, great – really great – instructions. Fabulous! I will try this one out after my run today – I have a handy wall in front of the house I can use for it.
LikeLiked by 1 person
So how’d it go? 🙂
LikeLiked by 1 person
Oh gosh – I told Claire all about this series, I said how we were both going to do it – then I forgot how to do it and all the instructions! I am so physically illiterate, I find it incredibly hard to remember and replicate physical movements and, it turns out, positions!
LikeLiked by 1 person
You’d have to print it out — believe me, I’m still working on remembering all those nuances myself!
At some point I’ll probably offer some sort of PDF, but that won’t be for a long time.
Just keep practicing. That’s what the practice is for!
LikeLike
Ooh I’m going to love this series. Thank you! I have a Yoga for Runners module but I find stills easier to learn from than a video.
I really feel that integrating a few poses has helped enhance the PT exercises. My left leg is still a butthead, but I think it’s less so thanks to tree and downward dog, although that’s very much modified. Look forward to trying this one.
LikeLiked by 1 person
That’s really interesting that you find stills easier! We just shot the next pose today. 🙂
LikeLike